
Background
Cassava is mainly grown in mountainous areas or gentle slopes in tropical and subtropical regions. During harvesting, its roots are particularly prone to mechanical damage. Within 2-3 days after harvest, cassava roots rapidly develop physiological metabolism problems such as water imbalance and abnormal respiration, which then leads to Post-Harvest Physiological Deterioration (PPD) (see Figure 1). PPD greatly reduces root quality and causes them to unfit for consumption or processing. Statistics show that in areas lacking effective treatment measures, the total loss rate of roots can be as high as 30% to 50%. These losses make food insecurity and economic losses even more serious. Post-harvest losses are influenced by factors across the entire value chain and occur mostly in links such as harvesting, temporary field storage, transportation, market storage, and primary processing. Therefore, post-harvest loss of cassava is a major challenge for cassava‑producing countries and regions. Taking systematic loss reduction measures is the most direct and important way to improve the efficiency of the cassava value chain, ensure food security and increase farmers' income.

Figure 1 Post-harvest Physiological Deterioration
(Note: A: 0 days; B: 5 days; C: 10 days; D: 15 days; E: 20 days)
Factors Affecting Post-Harvest Physiological Deterioration
• Variety Differences
Different cassava varieties differ greatly in their resistance to post-harvest rotting. Varieties with thicker and tougher skin can heal wounds faster and block disease-causing organisms more effectively. In contrast, varieties with thin and soft skin are easily damaged and have weaker natural defenses, making them more prone to rapid breakdown and rotting. See Figure 2.
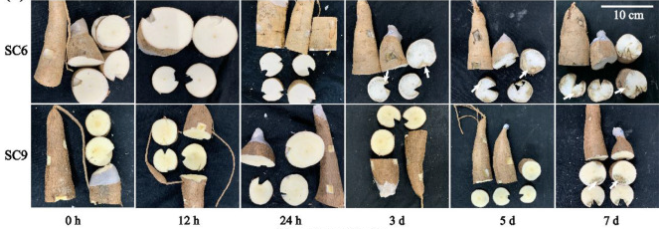
Figure 2. Differences in wound-healing time among different cassava varieties (Source: from the internet)
• Root Integrity
Keeping cassava roots intact can greatly reduce post-harvest rot. Studies show that broken or wounded parts of the roots are the first to become soft, rot, and get infected by microbes, after which the infection spreads quickly to the whole root. Therefore, it is very important to use harvesting tools properly to keep the roots intact during harvest. Common tools for manual cassava harvesting are shown in Figure 3. It works by clamping the forked end of the harvester onto the main stem of the cassava plant, and then slowly shaking and lifting the other end, allowing the cassava roots to be pulled out of the soil.
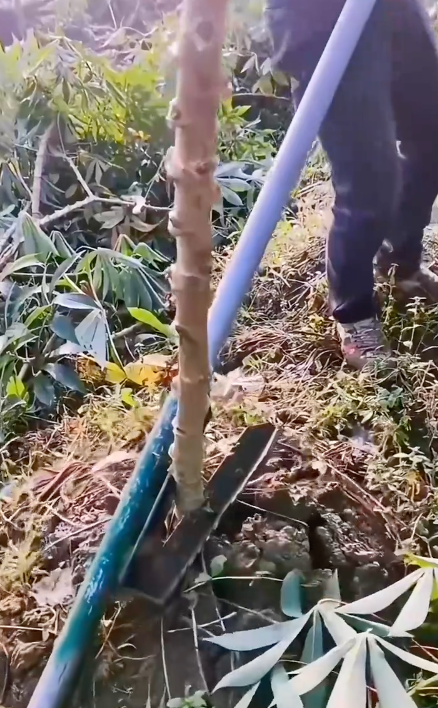
Figure 3. Cassava Puller
• Climatic and Soil Conditions
Humidity is a key factor in keeping cassava roots fresh after harvest. If the humidity is too high, water droplets form on the root surface, providing disease-causing organisms with the moisture they need to grow, infect, and spread more quickly. High humidity also prevents moisture from evaporating from the root skin, which makes it harder for wounds to heal.
On the other hand, if the air is too dry, roots lose water too quickly. Their skins wrinkle, cell functions become disrupted, and they become less able to resist damage—this indirectly makes them more prone to rotting. The best relative humidity is between 70% and 80%, which keeps roots fresh and slows the growth of harmful organisms.
Long periods of rain or excessive irrigation can damage the soil structure. Once the water dries, soil particles clump tightly together, making the soil hard. This makes it difficult to harvest roots without causing damage. Therefore, after several consecutive rainy days, the land and cassava plants should be allowed to dry out completely before harvesting.
Measures to Prevent Post-Harvest Physiological Deterioration
• Sand Storage
Pick a dry, well-ventilated indoor space or a shaded outdoor area. First, lay down a 10~15 cm layer of dry river sand, ensuring the sand’s moisture content is between 10% and 15%. Then place undamaged roots neatly on top and cover them with another 5~8 cm layer of sand. Stack the layers carefully, but keep the total height below 50 cm.
The sand helps maintain suitable humidity around the roots, preventing them from drying out and wrinkling or becoming overly damp with water droplets. It also acts as a physical barrier, blocking disease-causing organisms from spreading and slowing the roots’ natural aging. This method is suitable for short-term storage—up to 1~2 months. See Figure 4.
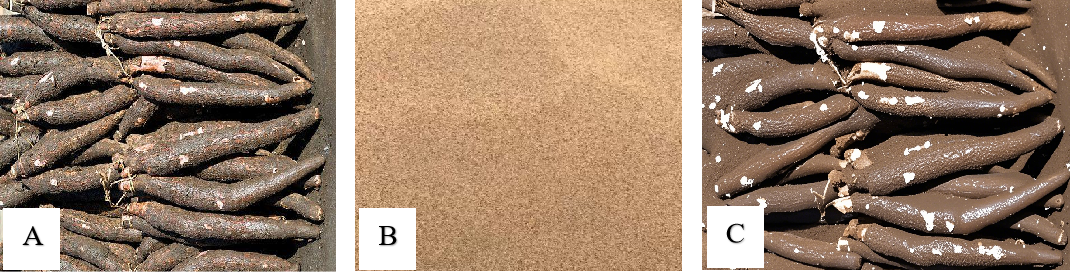
Figure 4. Sand Storage
(A: Cassava roots. B: Prepared sand. C: Cassava roots during storage)
• Cave Storage
Cave storage uses natural conditions to create a space with stable temperature and humidity. It works well in mountainous areas or places with low groundwater levels. Choose a high, dry, welldrained field and dig a cave (2–3 m deep; the size depends on the amount to be stored). Cover the bottom with a 10 cm layer of dry straw or sand to absorb moisture. Stack the roots in layers and cover them with a small amount of sand. Leave vents at the entrance and cover it to keep rain out and reduce temperature fluctuations.
In a cave store, the temperature generally stays around 12–18 °C and relative humidity around 75%–85%. This slows down respiration and suppresses the growth of disease-causing organisms, making the method effective for about one week. See Figure 5.
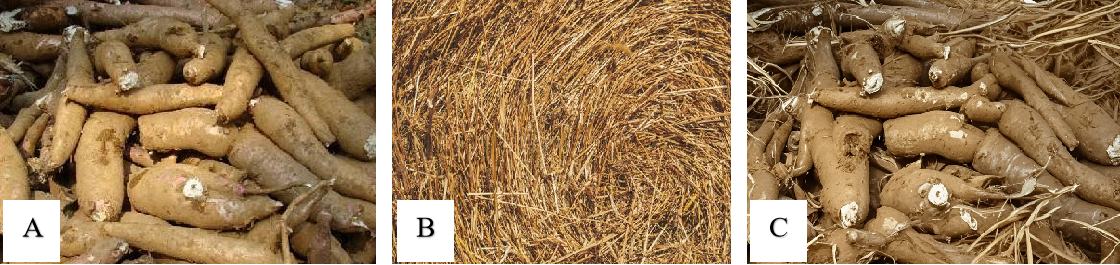
Figure 5. Cave Storage
(A: Cassava roots. B: Prepared grass. C: Cassava roots during storage)
• Paraffin Coating
A protective layer can be created on cassava roots by manually coating them with paraffin. First, choose food-grade paraffin, heat it until it melts, and then allow it to cool to 40-50℃. Take undamaged roots and dip them quickly into the liquid paraffin for just 1-2 seconds—remove them immediately and let them cool naturally. This forms a thin, even wax film on the surface.
This wax film is highly effective: it seals the tiny pores on the root skin, slows down respiration and water loss, reduces the release of ethylene (which accelerates ripening and deterioration), and blocks disease-causing organisms from entering. As a result, the roots stay fresh for a longer period.
A few points to note: make sure the root surface is completely dry before coating—any moisture will affect the formation of the wax film. Also, keep the wax layer thin, around 0.1-0.2 mm. If it is too thick, the roots cannot get enough air, and they will rot due to lack of oxygen. See Figure 6.
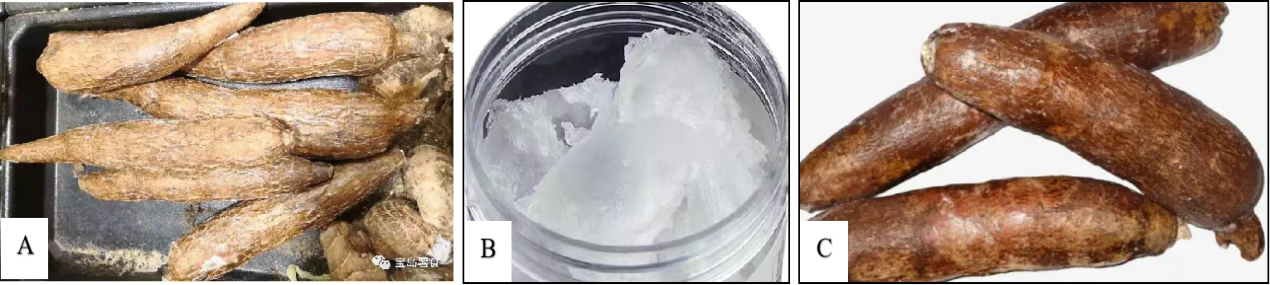
Figure 6. Paraffin Coating
(A: Cassava roots. B: Prepared paraffin. C: Paraffin-coated cassava roots)
• Refrigerated Storage
Choose cassava roots that are properly ripe, undamaged, and free of pests, diseases and mold. Do not use roots with wounds or rot, as they will spoil the whole batch during storage. Rinse dirt and impurities off the root surfaces with clean water. Then, as needed, place the peeled or unpeeled roots in a freezer for storage. Cut the peeled cassava into cubes, strips or slices as needed. Put them into food-grade sealed bags or vacuum packaging bags and then store them in a cold storage room at -18°C or below. See Figure 7.
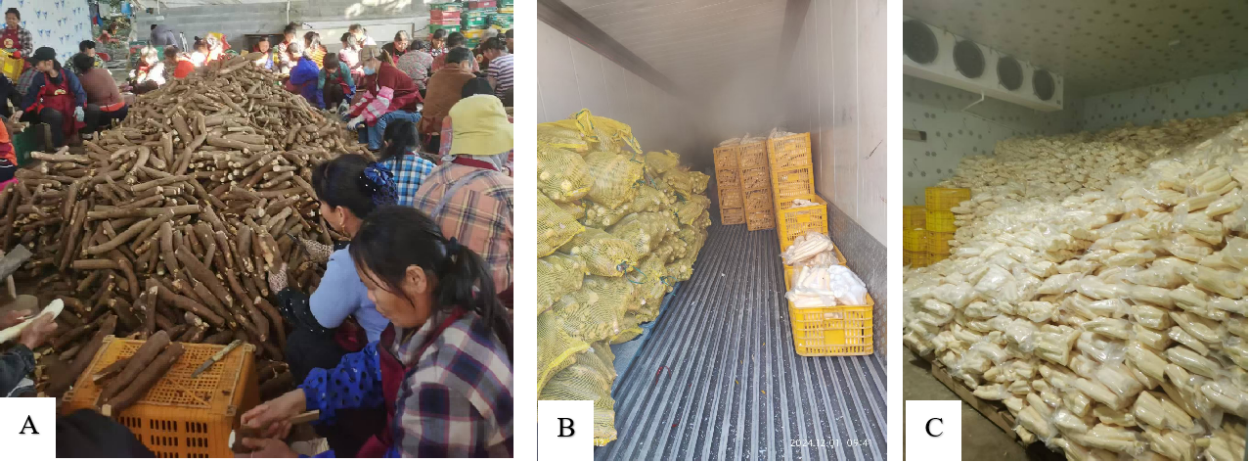
Figure 7. Refrigerated Storage
(A: Cassava roots. B: Freezer-stored cassava. C: Peeled, sectioned, vacuum-packed cassava stored in a freezer)
• Hypobaric Storage
This is an advanced technique for precisely controlling the storage environment. After harvest, cassava roots are placed in a sealed storage chamber where the internal pressure is reduced to 40–60 kPa. Every 12 hours, the chamber is briefly opened to restore atmospheric pressure for 30 minutes, then re-sealed and the pressure is lowered again to 40–60 kPa. The low-pressure environment reduces the amount of oxygen around the roots, slows respiration and prevents ethylene production. It also facilitates the rapid removal of harmful gases such as ethylene.
All this helps slow the roots’ natural decline and decay. This technology is suitable for short-term storage of high-quality cassava roots, helping keep them as fresh as possible. See Figure 8.
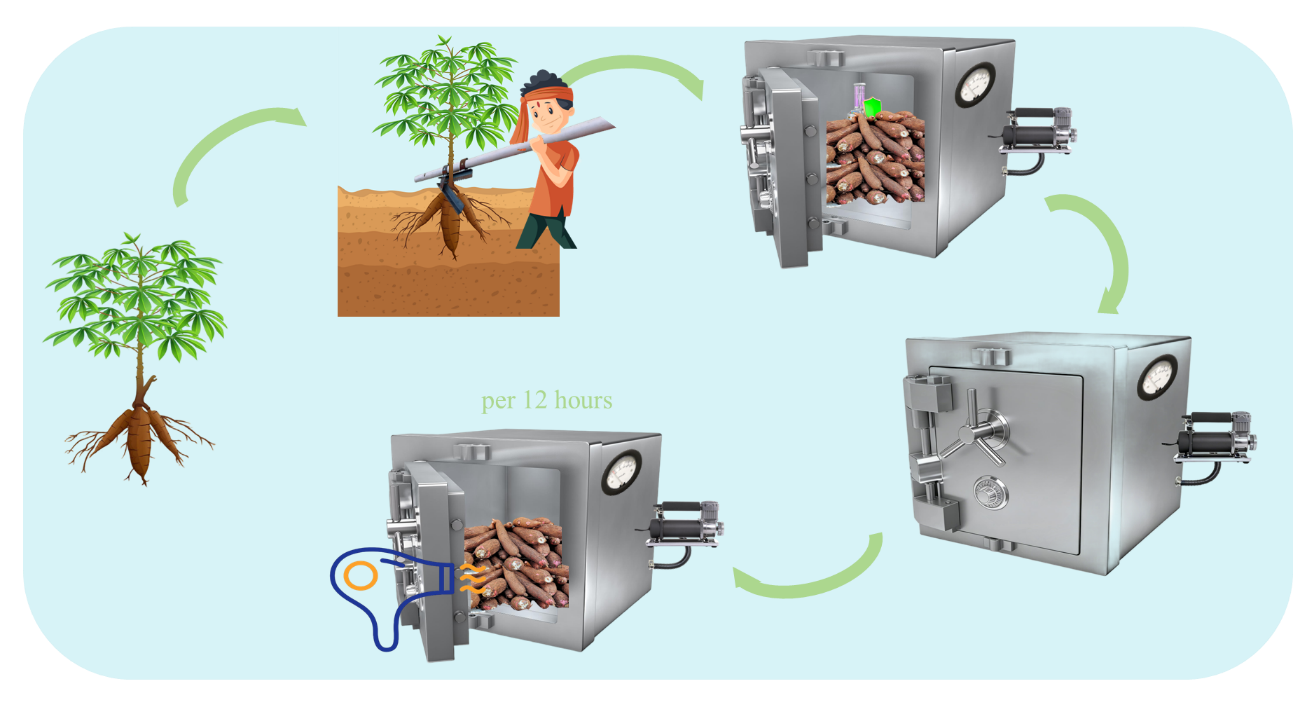
Figure 8. Hypobaric Storage
Conclusion
In summary, keeping cassava roots fresh after harvest and achieving effective storage depend on multiple key factors: First, selecting appropriate varieties—those with thicker, tougher skin tend to have better rot resistance and faster wound healing—and ensuring root integrity during harvesting are essential. Whether using manual tools (such as claw rakes, hoes, and crowbars) or mechanical harvesters (traction-type or self-propelled), avoiding damage is crucial to prevent rot from spreading.
Humidity and temperature control form the foundation of successful storage: maintaining relative humidity at 70%-85% prevents both dryness and mold, while temperature must be stabilized (12-18℃ for cave storage, 12-15℃ for cold storage, above 10℃ to avoid chilling injury, and -18℃ or below for freezing storage).
Various storage methods cater to different needs: manual wax coating for simple freshness retention, cave storage for mountainous areas with low groundwater levels, and cold storage for long-term preservation of processed cassava.
Additionally, auxiliary measures such as wound callusing, proper ventilation (to adjust O₂ and CO₂ levels), and ensuring root surfaces are dry before wax coating further enhance storage effectiveness.
Related links:
1. Technical Guide to Cassava Stem Storage

Category
Technical Solution
Contributor
Post-Harvest Loss Reduction Measures for Cassava Root
Country
Technical Solution